


Style Advice
HOW TO TIE A TIE - QUICK AND EASY STEP BY STEP
Tuesday, 25 January 2022
It’s a wildly simple thing tying a tie. Hell, it’s right there in the name. But getting it right? It matters. Pairing the right knot with the right occasion – and shirt collar – is crucial for a well-executed finishing touch. No, a fist-sized power knot won’t pair with your slim-cut shirt and blazer.
A man of style has more than a single go-to knot. Luckily, the three knots below can handle almost any sartorial situation.
THE HOLY TRINITY OF TIE KNOTS
THE SLIM KNOT
AKA the schoolboy knot - it’s most likely the first knot you were taught. This four-in-hand knot might be the simplest way to tie a tie but it’s undoubtedly versatile and more than does the job. It pairs especially well with slim collars, shirts with a slightly playful edge (hello floral) and for outfits that toe the line between smart and casual.

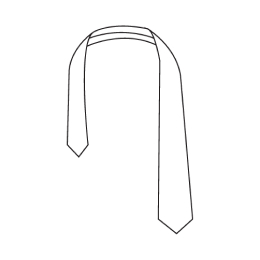
01
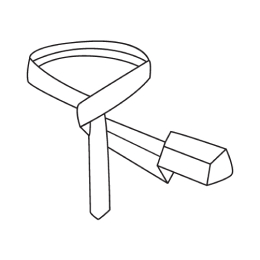
Place the tie around the neck. Make sure the wide end is about 1/3 longer than the narrow end.
02
Cross the wide end over the narrow end.
03
Loop the wide end back underneath the narrow end.
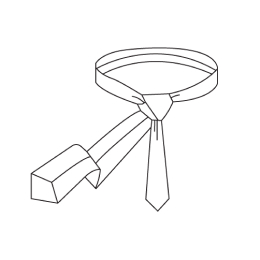
04
Bring the wide end over the narrow end once more.
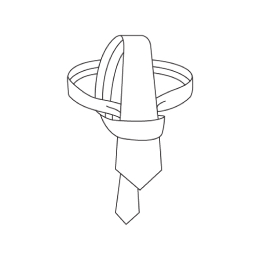
05
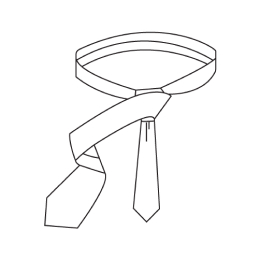
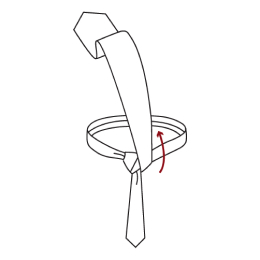
You'll have to loop now to knot the tie with. Hold the front of the loop you've created with your index finger and thumb, and bring the wide end up behind through the neck loop.
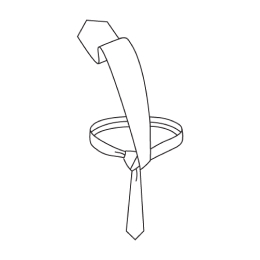
06
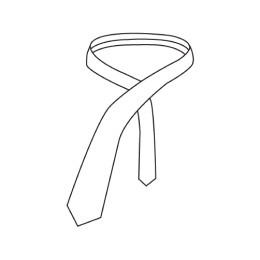
Pass the wide end down through the loop in front. To tighten, pull the wide end of the tie downwards and slide the knot up towards your neck.
THE HALF WINDSOR
Think of the Half Windsor knot as your Monday to Friday go-to. It’s classic triangular shape pairs with a semi-spread collar in perfect proportion. It’s also a clever option for taller, lankier guys since it uses a little less fabric to knot letting your tie hang longer.
01
Place the tie around the neck and make sure the wide end is 1/3 longer than the narrow end.

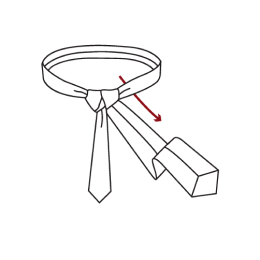
02
Cross the wide end over the narrow end and back around from behind.
03
Lift the wide end up and feed it down through the neck loop.
04
Pull the wide end to the right so that it's inside out.
05
Cross the wide end over to the other side and up thrrough the neck loop.

06
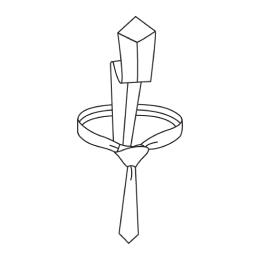
Feed down through the loop you've just created in the front. To tighten, pull down on the wide end and slide the knot up with your other hand.
THE FULL WINDSOR
You want the power option? Here it is. The Full Windsor is one of the trickiest knots to learn, but it makes the most impact. Best paired with a wide, spread collar shirt and a suit jacket with a slightly thicker lapel. Also, the Full Windsor is a smart weapon for the gent with a thicker neck to keep everything in proportion.

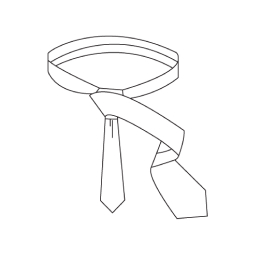
01
Place the tie around the neck and make sure the wide end is 1/3 longer than the narrow end.
02
Cross the wide end over the narrow end and pass up through the neck from underneath.
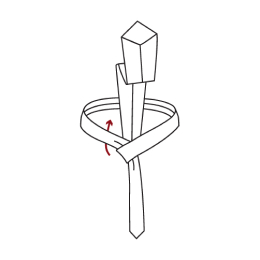
03
Pull down to the left.
04
Cross over to the right from behind.
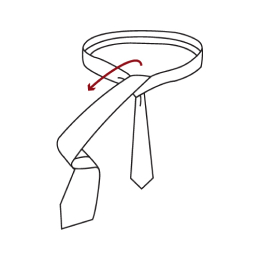
05
Pull up towards the neck loop.
06
Feed through the neck and pull down to the right.

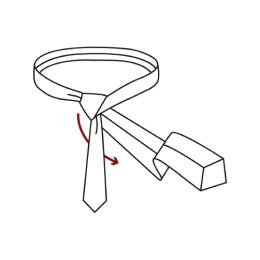
07
Cross over to the front to the left and back up through the neck.

08
Feed through the front loop that you've just created at the front. Tighten by pulling down on the wide end and sliding the knot with your other hand to adjust.
STYLE TIP
Looking to elevate your tie game and already have a tie bar? Try adding a dimple to your knot for a subtle finishing touch. It’s dead simple. Put your index finger just below your loosely tied knot then tighten up as usual. Boom – next level tie style.

GO ON, ADD A TIE
SHOP TIES